In a world dominated by instant messages and social media updates, the charm of receiving a handwritten greeting card remains unmatched. A personalized greeting card carries with it a sense of thoughtfulness and intention—something mass-produced store-bought cards often lack. Designing and printing your own greeting cards is not only a creative outlet but also a heartfelt way to connect with your friends, family, or clients.

Whether you’re crafting cards for birthdays, weddings, holidays, or just because, adding a personal touch turns a simple piece of paper into a cherished keepsake. In this guide, we’ll walk you through the art of creating your own greeting cards, from the design phase to printing the final product.
Why Choose Personalized Greeting Cards?
Before diving into the how-to, it’s worth exploring why personalized greeting cards stand out:
- Meaningful Connection: A custom card shows the recipient you’ve invested time and effort, making the gesture more memorable.
- Creative Freedom: You have total control over the design, colors, message, and style—something pre-made cards can’t offer.
- Cost-Effective for Multiple Occasions: Designing your own cards allows you to reuse templates and adjust for birthdays, anniversaries, holidays, or even business thank-you cards.
- Eco-Friendly Options: You can choose sustainable materials and print only what you need, reducing waste.
Now, let’s break down the steps to design and print your own beautiful greeting cards.
Step 1: Choose a Design Platform or Software
The first step in creating your greeting card is choosing how you’ll design it. Depending on your skill level and preferences, here are a few great options:
- Canva: User-friendly and packed with templates, graphics, and fonts perfect for beginners.
- Adobe Photoshop or Illustrator: Ideal for advanced users who want complete control over design elements.
- Microsoft Word or Publisher: Great for simple layouts and easy printing.
- Procreate or drawing apps: Perfect for those who prefer hand-drawn illustrations.
When designing, think about the occasion, color scheme, and overall mood. Would your card look better with a minimalist aesthetic or a vibrant, playful vibe? Don’t forget to leave space for a personalized message.
Step 2: Select the Right Images, Graphics, and Fonts
Images and fonts play a huge role in the visual appeal of your card. Use high-quality photos, illustrations, or your own drawings. Avoid using too many different fonts to maintain a cohesive design. Choose fonts that are readable and fit the tone of your message—classic serif fonts for formal occasions, playful handwritten fonts for birthdays, and so on.
Consider adding:
- Personal photos
- Watercolor backgrounds
- Illustrations or clip art
- Borders and dividers
- Inspiring quotes
Remember, less is often more when it comes to design.
Step 3: Craft a Heartfelt Message
A beautiful design deserves an equally thoughtful message. Tailor your message to the occasion and the person receiving the card. If you’re printing in bulk (for weddings, holidays, or business purposes), leave space for a handwritten note to personalize each card even more.
If you’re unsure what to write, here are a few starting points:
- Express gratitude
- Share a favorite memory
- Include an inside joke
- Offer well wishes for the future
Step 4: Choose the Best Printing Materials
Here’s where the magic happens—bringing your design to life with the right printing materials. Regular printer paper won’t do justice to your artwork, so it’s essential to pick a material that adds quality and durability to your card.
For the best results, consider inkjet card paper. This specialty paper is designed specifically for inkjet printers and is thicker than standard printing paper. Its coating allows for vibrant color absorption without smudging or bleeding, resulting in professional-looking cards you’ll be proud to give.
Inkjet card paper also comes in various finishes—matte, glossy, or textured—so you can select the style that best complements your design. Matte paper offers a classic, smooth feel perfect for writing, while glossy finishes make photos and colors pop.
Step 5: Print Like a Pro
Now that you’ve chosen your design and paper, it’s time to print. Here are a few tips for achieving high-quality results:
- Printer Settings: Adjust your printer settings to “best” or “high quality” and ensure you select the correct paper type (cardstock or photo paper).
- Test Print: Always run a test print on regular paper to check layout, colors, and alignment.
- Double-Sided Printing: If your design is front and back, make sure your printer supports double-sided printing or manually flip the paper to print on both sides.
- Ink Consideration: Use fresh ink cartridges to avoid streaks or faded prints.
Once printed, let the ink dry completely before handling or folding the card to prevent smudging.
Step 6: Add the Finishing Touches
After printing, it’s time to add those special touches that truly make your card unique:
- Handwritten Notes: Even a short, personal line adds warmth.
- Embellishments: Stickers, ribbons, or washi tape can elevate your card’s design.
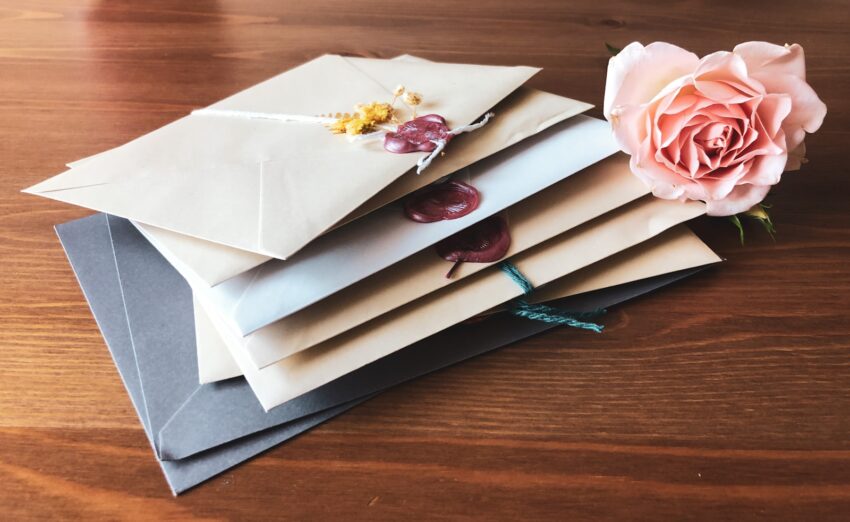
- Custom Envelopes: Pair your card with a matching envelope or one you decorate yourself.
- Stamps or Seals: Wax seals or rubber stamps add a classy vintage feel.
Step 7: Send with Love
Your personalized greeting card is now ready to make someone’s day! Whether you mail it or hand it over personally, your card is sure to leave a lasting impression.
Final Thoughts
Designing and printing your own greeting cards is a rewarding and creative experience that allows you to express your feelings in a truly personal way. From choosing the perfect images to printing on quality inkjet card paper, every step is an opportunity to show someone you care.
In a fast-paced digital world, a custom greeting card stands as a reminder of the beauty of slowing down and creating something meaningful. So, grab your supplies, fire up your printer, and start designing cards that speak from the heart—you might be surprised at how much joy it brings you and the people you love.